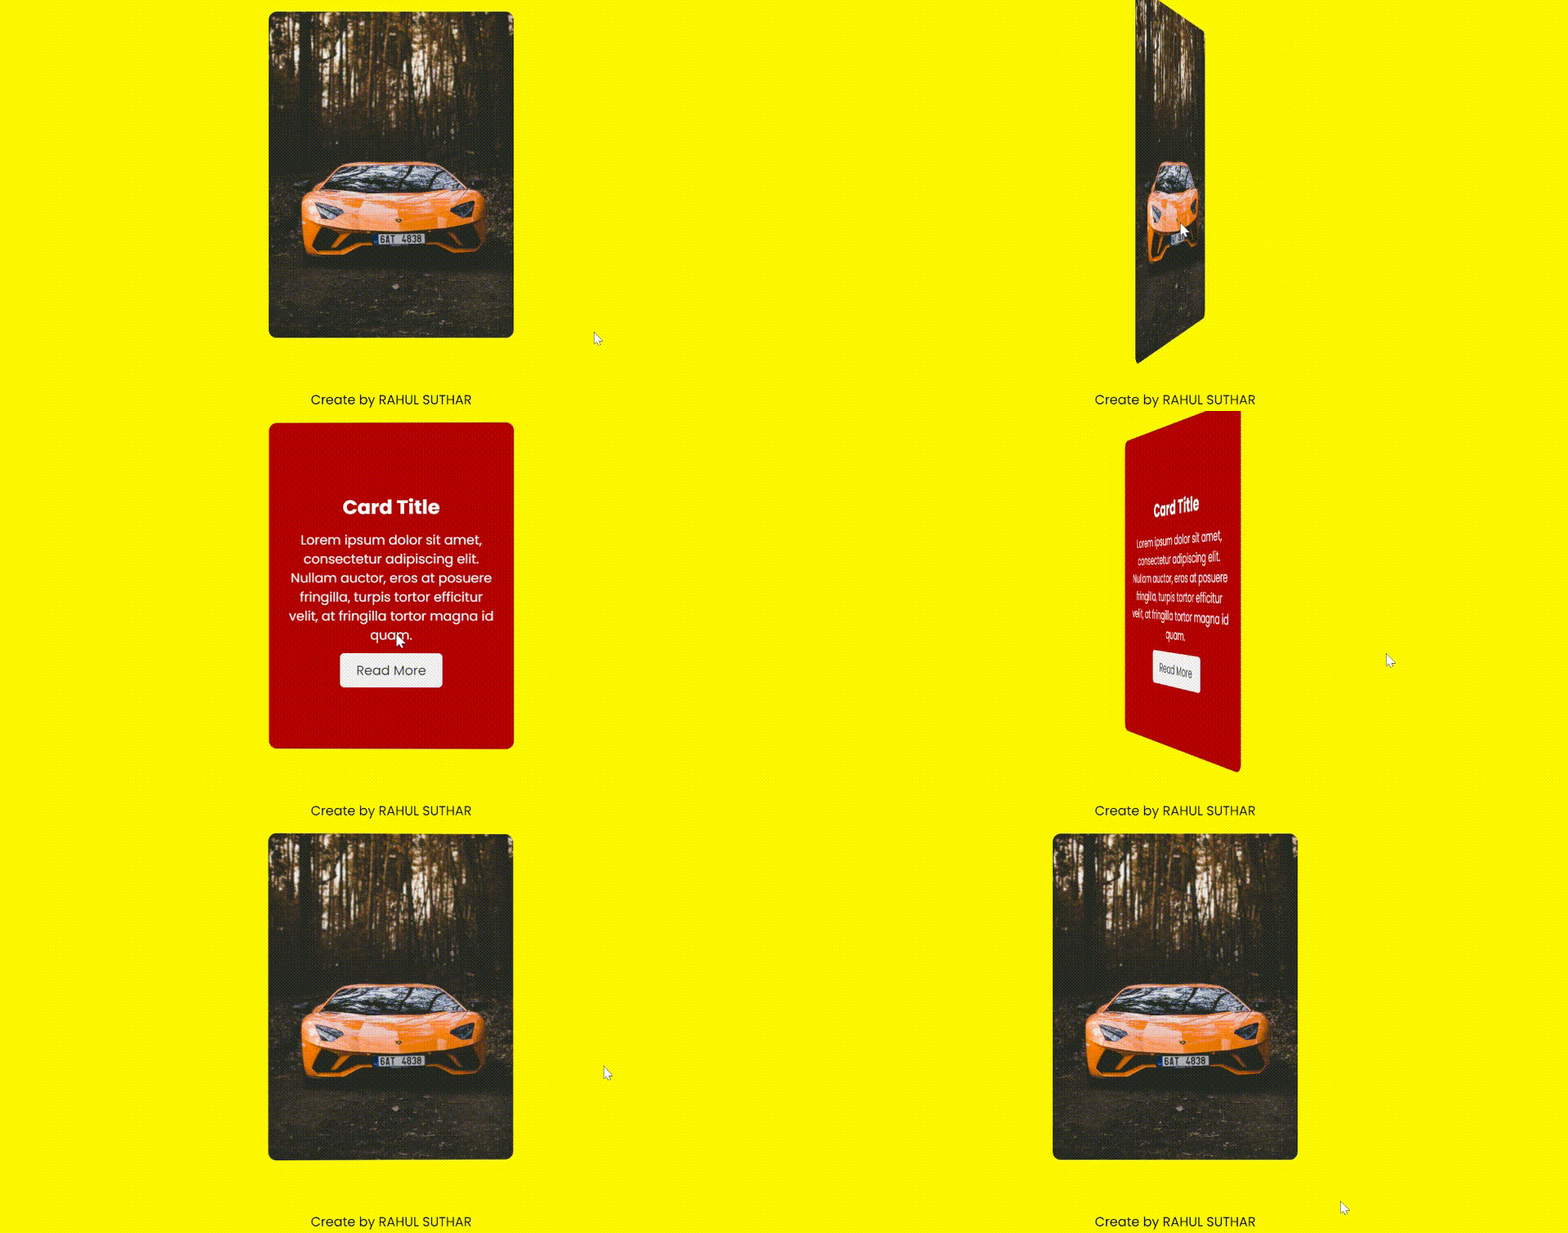
How To Create a Flip Card Using HTML and CSS | HTML और CSS को Use करके Flip Card बनाये
Create a Flip Card Using HTML and CSS: अगर आप भी HTML और CSS का use करके Flip Card बनाना चाहते है तो इस article को अंत तक पढ़े, आज के इस article में हम आपको Flip Card को design करना सिखायेगे| Flip Card बनाने के लिए आपको निम्नलिखित steps को follow करना है।

Step 1: Visual studio Code (VS Code) open करे
Step 2: एक नयी HTML File, index.html के नाम से और एक CSS file, style.css के नाम से बनाये।
HTML की फुल फॉर्म Hypertext Markup Language है। यह एक markup language है। इसका main काम हमारे project को structure provide करना है। Flip Card के structure को बनाने के लिए सबसे पहले <head> section में CSS file को link tag की मदद से attach करे।
<!DOCTYPE html>

<html lang="en">

<head>

    <meta charset="UTF-8">

    <meta name="viewport" content="width=device-width, initial-scale=1.0">

    <title>Flip card</title>

    <link rel="stylesheet" href="style.css">

</head>
Step 3: अब एक image download करे और उसका नाम बदल कर 1.jpg कर दे।
अब इस image को उसी folder में रख दे जहा आपकी index.html और style.css files रखी हुई है। अब निचे दिए गये code को body tag में add कर दे।
<div class="flip-card">
<div class="flip-card-inner">
<div class="flip-card-front">
<img src="1.jpg" alt="Card Front Image">
</div>
<div class="flip-card-back">
<div class="card-content">
<h2>Card Title</h2>
<p>Lorem ipsum dolor sit amet, consectetur adipiscing elit. Nullam auctor, eros at posuere fringilla, turpis tortor efficitur velit, at fringilla tortor magna id quam.</p>
<a href="#" class="btn">Read More</a>
</div>
</div>
</div>
</div>
<div class="attribute">
Create by
<a href=""></a>
RAHUL SUTHAR
</a >
</div>Read More: Developers और Designers के लिए Top 5 CSS Framework
Step 4: अब CSS file जो style.css नाम से create की थी open करे और निचे दिए गये code को add कर दे।
@import url('https://fonts.googleapis.com/css2?family=Poppins:wght@400;600;700&display=swap');

*{

    box-sizing: border-box;

    margin: 0;

    padding: 0;

}

style the body

body {

    font-family: sans-serif;

    min-height: 100vh;

    width: 100%;

    display: flex;

    align-items: center;

    justify-content: center;

    background-color: rgb(255,251,0);

    font-family: 'poppins';

    position: relative;

}

/* The flip card container - set the width and height to whatever you want. We have added the border property to demonstrate that the flip itself goes out of the box on hover (remove perspective if you don't want the 3D effect */

.flip-card {

    width: 300px;

    height: 400px;

    perspective: 1000px;  /* Remove this if you don't want the 3D effect */

}

  /* This container is needed to position the front and back side */

.flip-card-inner {

    position: relative;

    width: 100%;

    height: 100%;

    border: none;

    border-radius: 10px;

    transition: transform 0.6s;

    transform-style: preserve-3d;

}

  /* Do an horizontal flip when you move the mouse over the flip box container */

.flip-card:hover .flip-card-inner {

    transform: rotateY(180deg);

}

  /* Position the front and back side */

.flip-card-front, .flip-card-back {

    position: absolute;

    width: 100%;

    height: 100%;

    backface-visibility: hidden;

    border-radius: 10px;

}

.flip-card-front {

    background-color: #f1f1f1;

    overflow: hidden;

}

.flip-card-front img{

    max-height: 100%;

}

/* Style the front side (fallback if image is missing) */

.flip-card-back {

    background-color: #b40303;

    color: white;

    transform: rotateY(180deg);

    display: flex;

    justify-content: center;

    align-items: center;

}

.card-content {

    padding: 20px;

    text-align: center;

}

.card-content h2 {

    font-size: 24px;

    margin-bottom: 10px;

}

.card-content p {

    font-size: 16px;

    margin-bottom: 20px;

}

.btn {

    padding: 10px 20px;

    background-color: #f1f1f1;

    color: #333;

    text-decoration: none;

    border-radius: 5px;

}

.btn:hover {

    background-color: #333;

    color: #f1f1f1;

}

.attribute{

    position: absolute;

    bottom: 10px;

}
Step 5: Create a Flip Card Using HTML and CSS Output
अब F5 press करे और अपना Browser Select करे। आपको उपर दिखाए गये Flip Card के Output जैसा Output Show होगा। अगर आपको Output Show नहीं हो रहा है या कोई Error आ रहा है तो आप Comment करके इसके बारे में हमसे पूछ सकते है।


